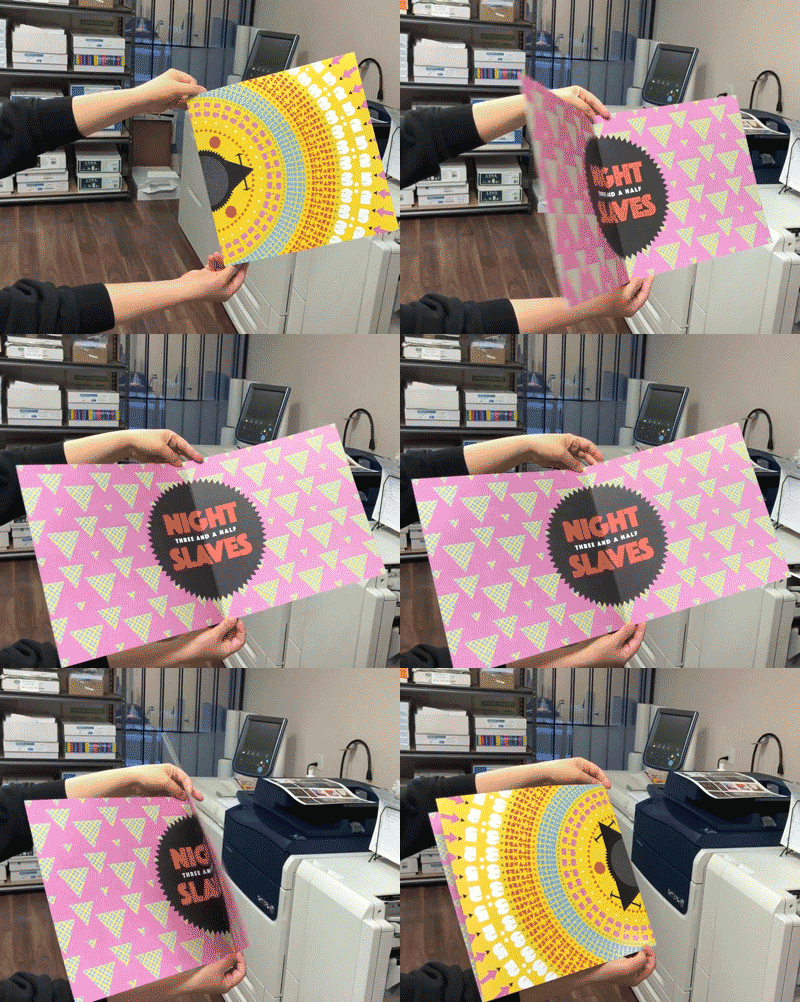
Nothing makes us happier than receiving print-ready art files. This saves you time from having to redesign files, saves us time from emailing you a list of issues, and it gets your album or artwork out the door and in your hands quicker. You may be wondering what’s the best way to prepare double-sided or multi-page artwork files for print. Great question, here’s a quick summary:
1) Download the correct templates
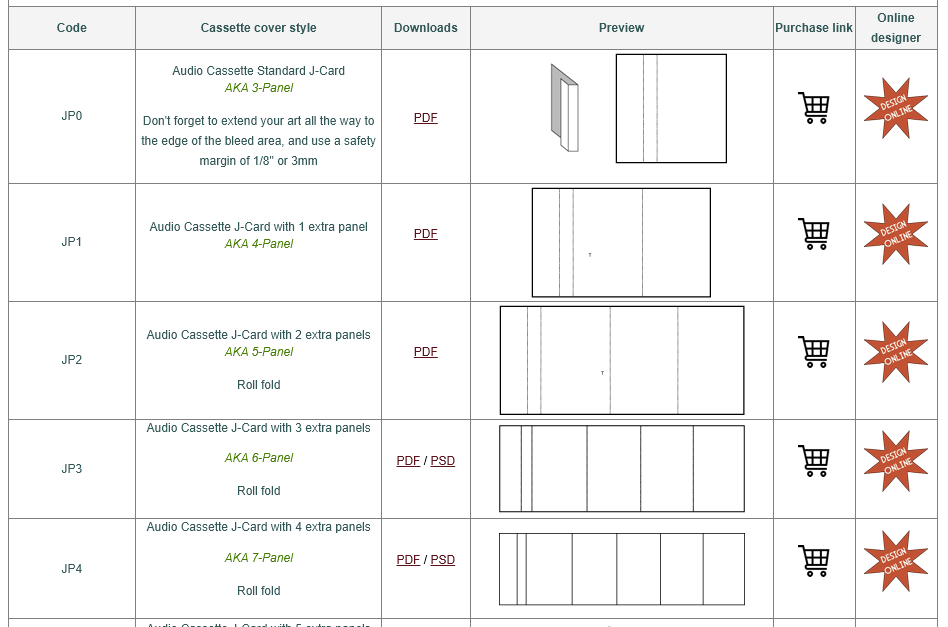
This will always be the first step for any artwork tutorial. Download the templates off of our site, as they are sized to our printing standards and products. Make sure you download the latest template, not just the one that’s been sitting in your Documents folder for two years!
2) Add art in a separate layer
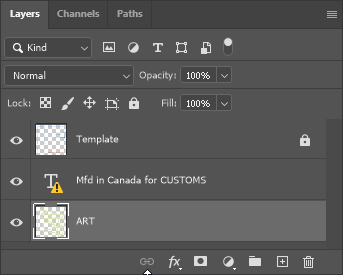
Most templates will have two visible layers: one that’s marked for Templates, and one that’s marked for Art. Please design using the Art layer in CMYK. If you don’t see an Art layer, create a new layer.
You can begin designing your artwork. Some templates, like our cassette J-cards, will have a file for the front cover and another file for the back cover. The template may also include a file specifically for Adobe Illustrator users where front and back covers are spread across two pages.
3) Save files twice, with and without the template lines
You’ll have to hit Save As two times per page. Once with the template layer visible, and once with the template layer disabled.
STEPS 4 AND 5 APPLY TO ADOBE PHOTOSHOP USERS,
ADOBE ILLUSTRATOR USERS CAN SKIP TO STEP 6
4) Open PDF Presentation
Have your front cover or first page file open. Click on File -> Automate -> PDF Presentation.
5) Add files
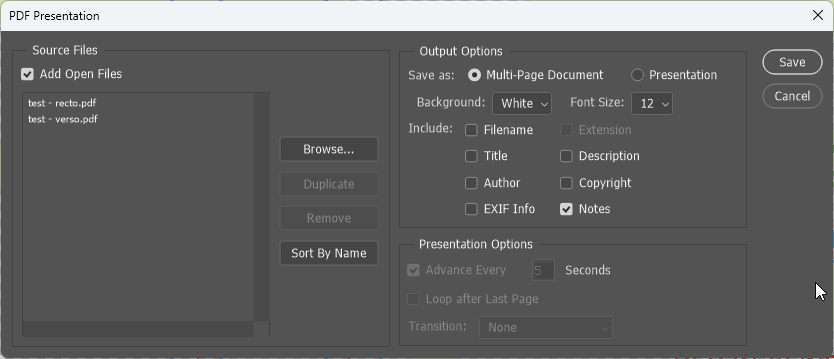
Here you can add files that are currently open in Photoshop, or browse to search for saved files. Make sure you’ve selected Multi-Page Document under the ‘Save As’ option.
Click ‘Save’. You’ll again have to do this twice: once with all the files that have template lines enabled, and once with the files that have template lines disabled.
6) Save as a PDF/X-1a:2001
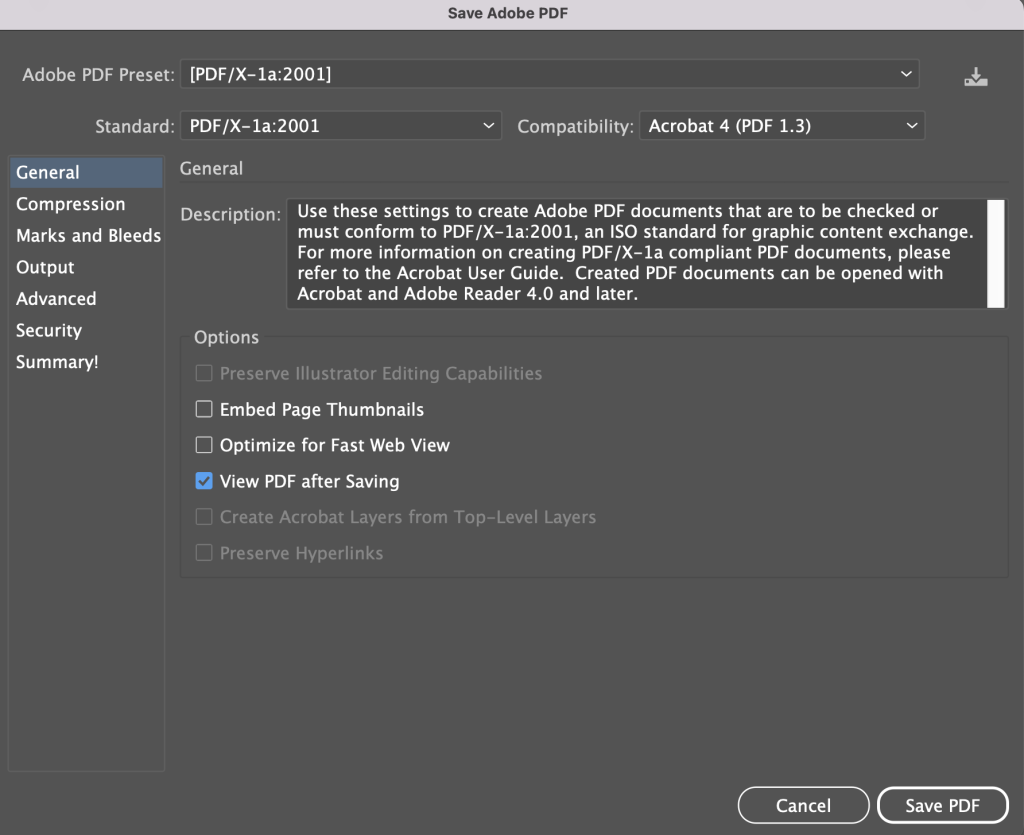
The final step! Just use the settings you see above. Most important is that the Adobe Preset is set to PDF/X-1a:2001.
That’s all you need to prepare your artwork! Leave the rest to us, and soon you’ll have high-quality artwork or packaging for your new album. We use digital press for small runs and super high-quality offset press for larger runs and by request. You can find all of our printed products in our online shop.
