Design Your Artwork the Right Way: A Guide to Print-Ready Files

Refused - The Shape of Punk to Come cassette artwork

We’re always looking for ways to make your Duplication.com orders more efficient. After all, you filled out the cassette duplication quote form, or purchased printed goods from the online shop, now you just want the product in your hands! We’ve realized that back-and-forth emails about album artwork has a tendency to slow down order production, which is why we thought it would be a good idea to share some pointers on how to optimize your album artwork design and delivery!

“Where do I upload my files?”

The age old question. The answer is pretty simple though: after you submit a quote request or buy a product from the online store, you will see an upload link on the file confirmation page. If you missed that, you’ll also find it in the confirmation email. This link will send you to your private FTP folder where you can upload both your audio files and artwork files. It’s best to zip the audio files and artwork files as separate folders, with easy to understand file names.


Have a Nice Life - Sea of Worry cassette artwork template

The Art of Print-Ready

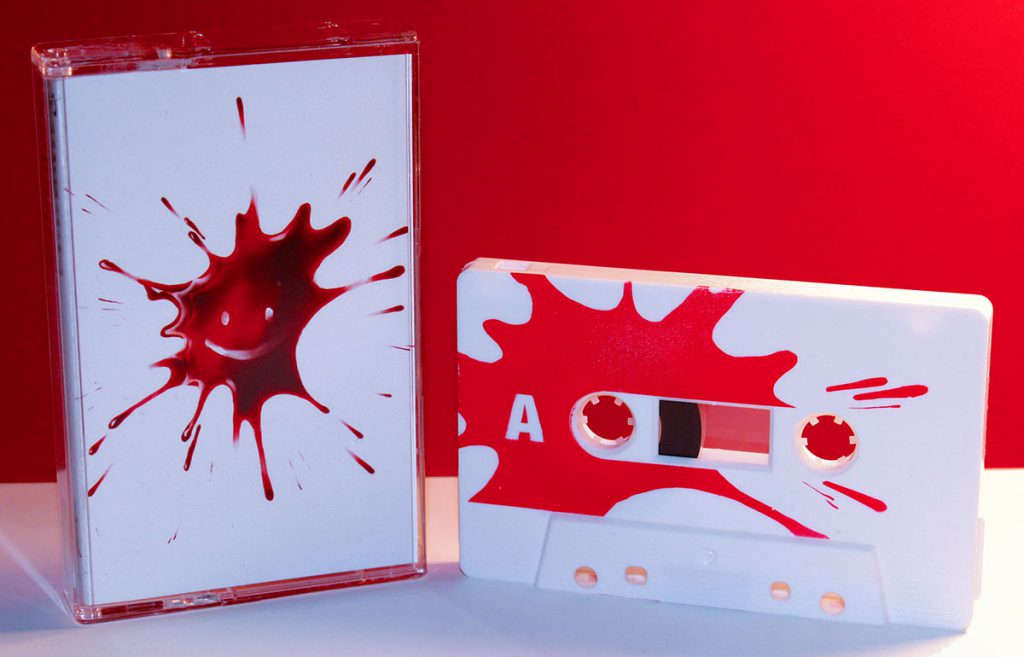
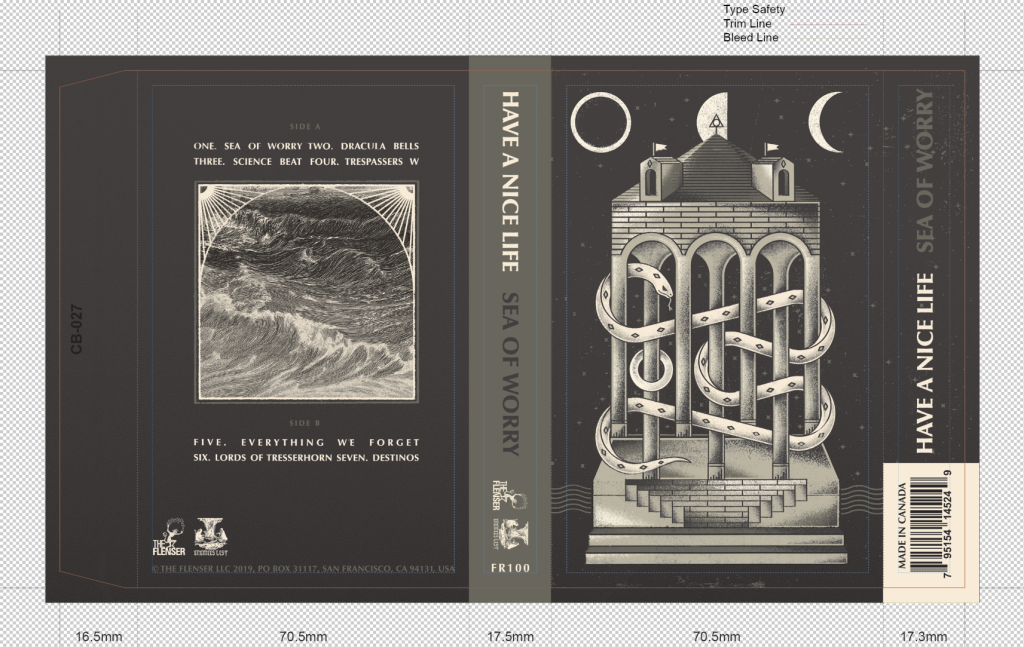
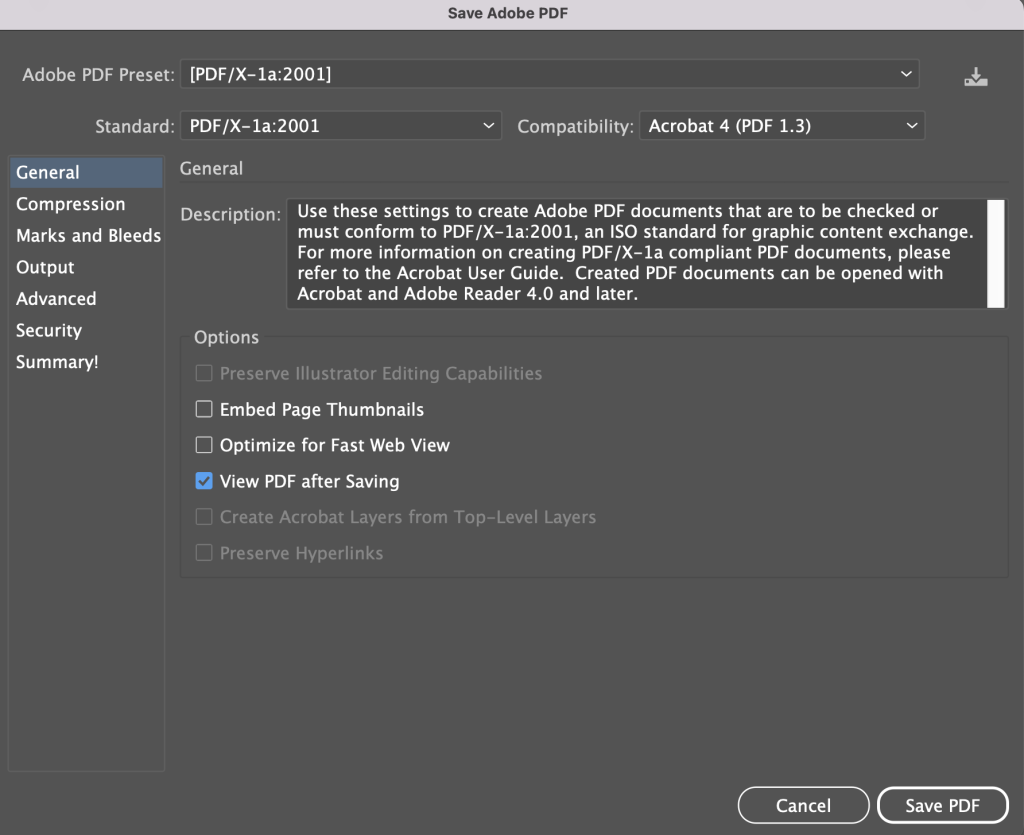
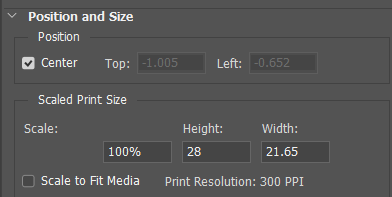
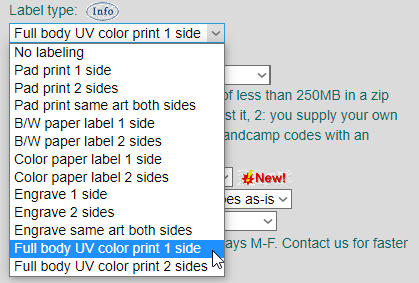
A print-ready file is exactly as it sounds: a digital file that’s formatted correctly and ready to print without the need of further adjustments. Here’s a short checklist:

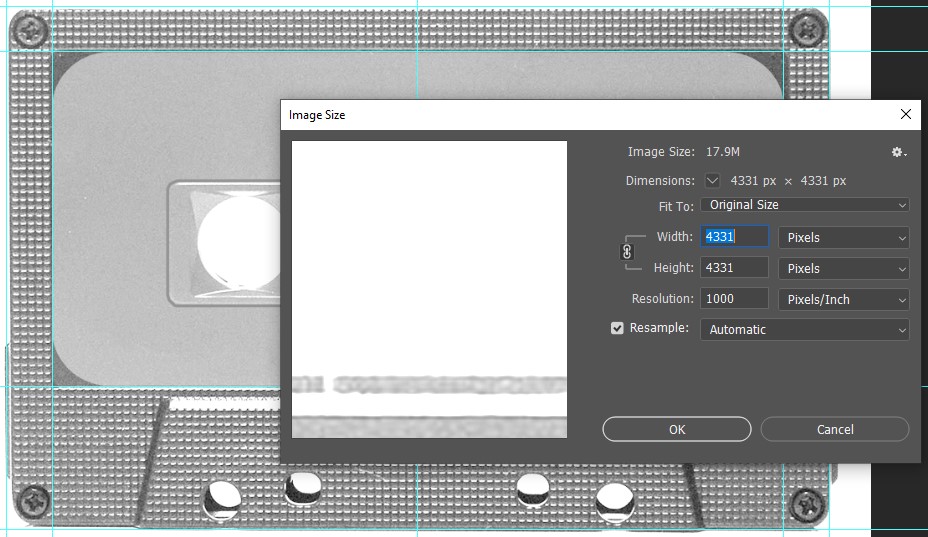
✅ The file should be in CMYK color mode
✅ 300dpi resolution
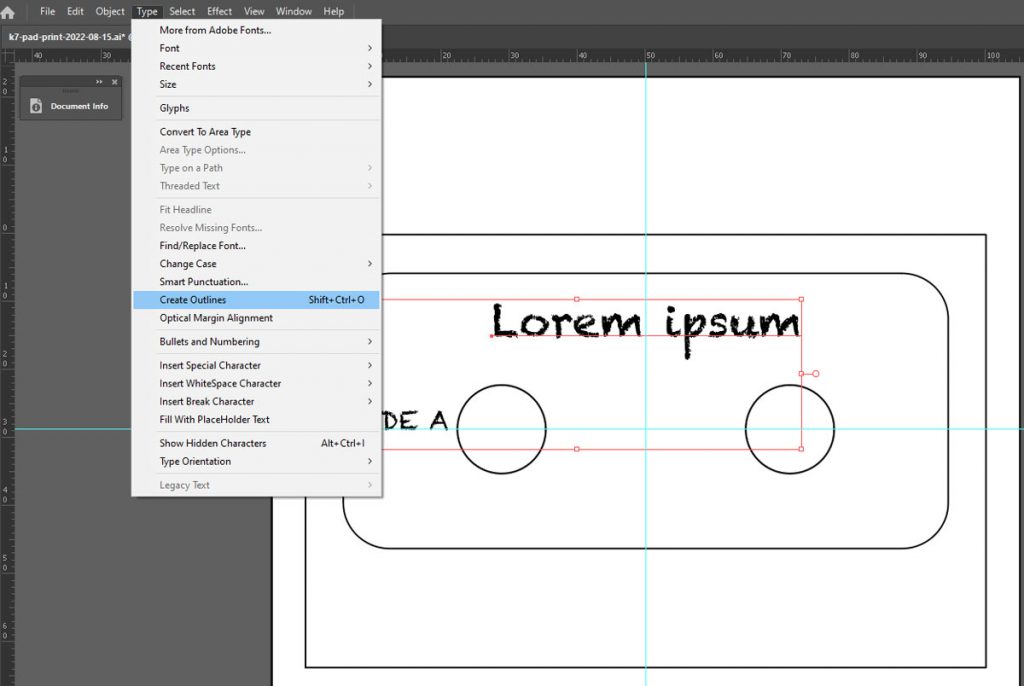
✅ Fonts are either embedded or converted to outlines
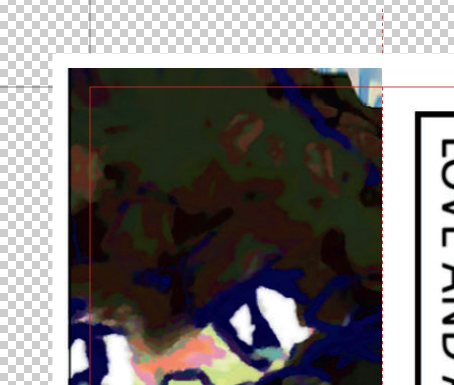
✅ Bleed has been added to ensure that there’s no white trim around the image
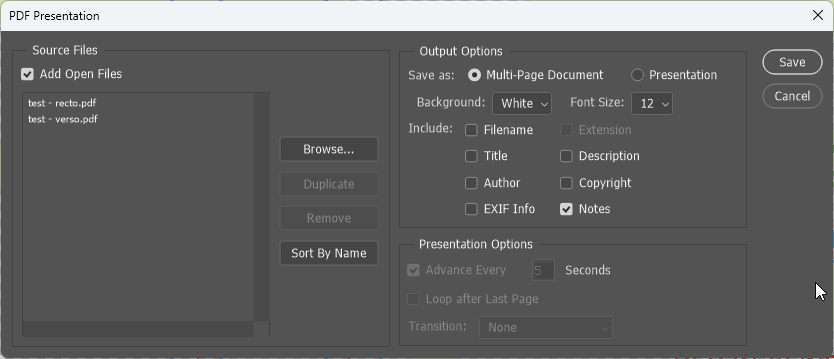
✅ Export to a PDF format (Photoshop users: export as Photoshop PDF)
✅ It’s helpful for us for you to label the file with the application you used (ex. jcard-front-photoshop.pdf)
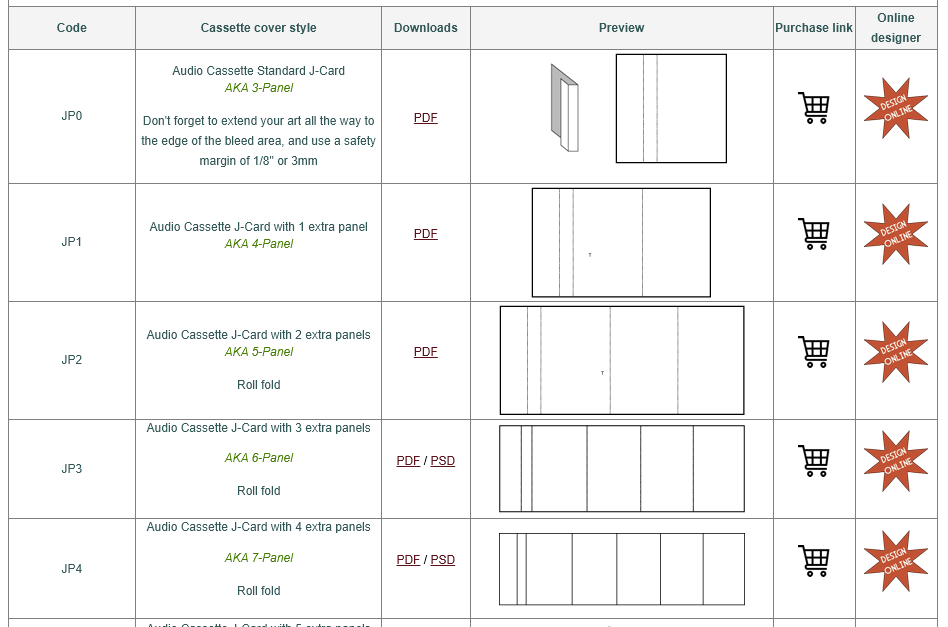
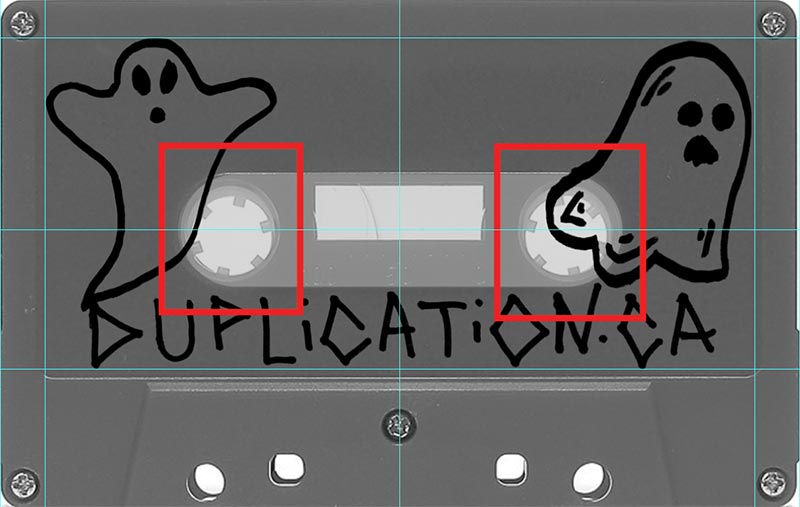
✅ For templates such as J-cards, CD covers, etc., please provide us with two files: one with the template lines, and one without the template lines.

Save As Adobe PDF

This may seem like a lot to a first-time designer, but we promise you that this is the industry standard for printers worldwide. If you follow this checklist, we most likely won’t need to hound you with questions, revisions, or the dreaded resubmission fee.


Made in Canada sticker for Terrorvision's The Rock-afire Explosion cassette

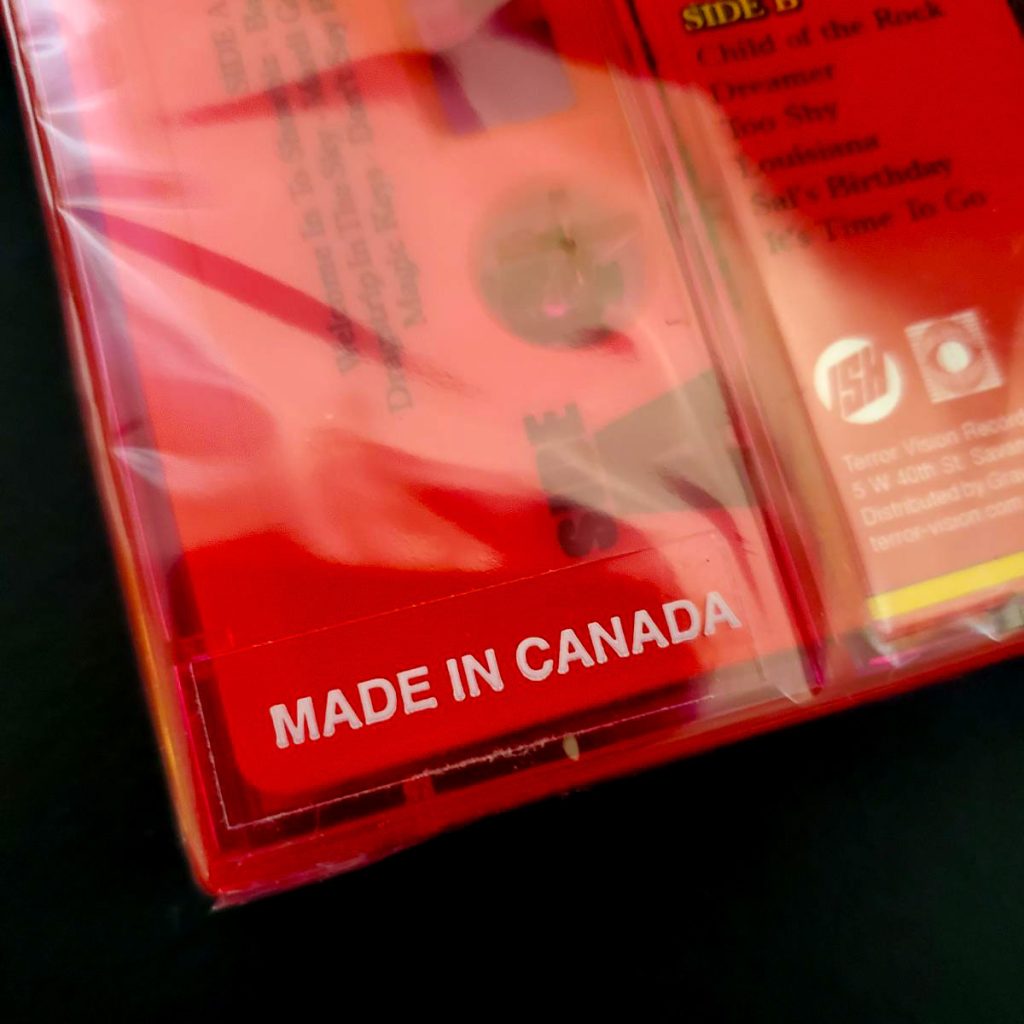
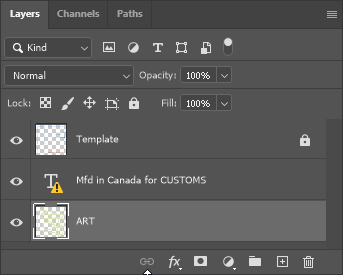
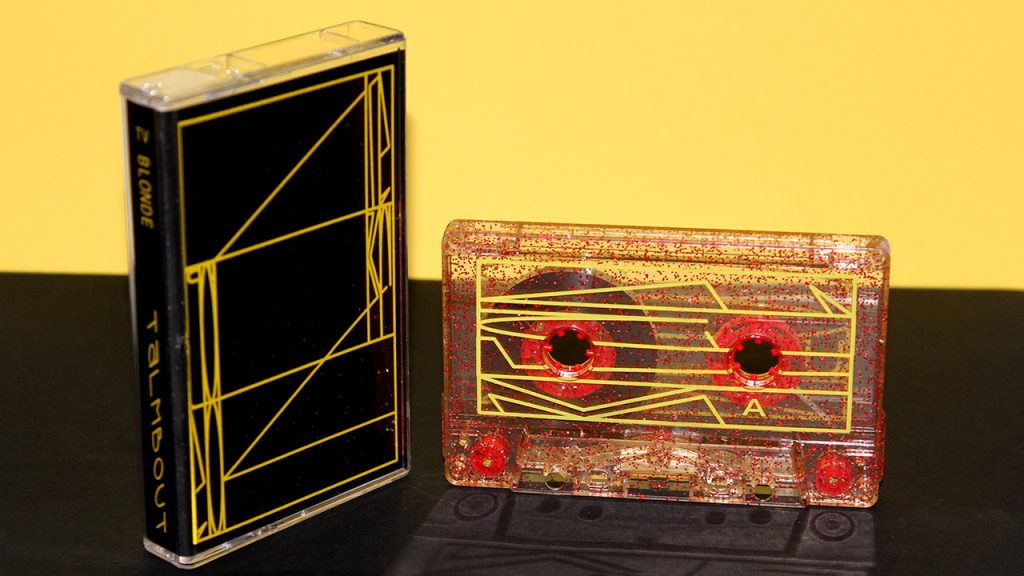
Country of Origin markings

If you open the newspaper you may be surprised to learn that shipping items across the border is an absolute freakshow right now. Fortunately we’ve got things settled and figured out on our end (check out our post about that for some very useful info!), but there’s something we need from your end: the ‘Made in Canada’ marking.

While we have an Ohio production facility, the majority of our print is still currently coming from our Toronto factory. This means it’s necessary to add ‘Made in Canada’ or ‘Manufactured in Canada’ to the outside of your package. It used to be that a batch of 100 cassettes could pass through the border uninspected, but given the tariff madness, those days are behind us. Don’t be a fool, don’t have your package sent back, just add the marking!

Now there’s a number of subtle ways to do this: you can always design your artwork to include “Made in Canada”. Use whatever font you want, and at whatever size, as long as it’s legible and visible in the exterior package. You shouldn’t have to squint or use a magnifying glass to see the text.

We also have stickers that can be placed on the package or the shrinkwrap. In fact, if you add shrinkwrap and Made in Canada (MIC) stickers, by default we’ll be placing the stickers on top of the shrinkwrap unless requested otherwise. Stickers are available in black or white print, and the option will be added to the cassette duplication form soon, just hold tight!

Digital or offset print: which is right for you?

First-time users and who are learning the ropes tend to have the same question when ordering printed artwork: what’s the difference between digital print and offset print? While they both are impressive in their own rights, there is quite a bit of distinction, and it’s worth taking a moment to educate yourself on the subject before placing an order!

Digital Print

If you’re ordering less than 300 copies of a CD wallet, J-card, or other printed material, it will likely be printed using our digital press. Digital print works a lot like your home digital printer, wherein rollers apply colored toner to a sheet of paper, and heat fuses the image with the sheet. But unlike your home printer (unless you’re living in an industrial printing facility) our digital press prints at a higher resolution with richer CMYK colors than your typical consumer models. Its inexpensive start-up costs allow for affordable short-runs prints while still maintaining a high quality output.

Feeding the metal plate into the offset press

Offset Print

High volume and high quality, the offset press is the golden standard for the printing industry. Far more complex than digital printing, an offset press requires metal plates with an etched design to apply ink to paper. Offset printing is typically used for larger runs (over 500 pieces), though through a custom quote you can request offset printing for shorter editions. Advantages include sharper and cleaner images, as well as the use of pantone colours allowing for greater colour accuracy. For cassette J-cards, offset print can be paired with our uncoated Cougar™ Super Smooth stock. You may want to consider this option due to it’s ultra high quality resolution and richer colours. Graphic designers and printers should accept no substitute!

Order J-cards in digital or offset print with cassette duplication

CD sleeves and wallets are printed in-house using the digital or offset press!

Guide to Preparing Double-Sided or Multi-Page Files for Print

Double-sided vinyl foldover printing

Nothing makes us happier than receiving print-ready art files. This saves you time from having to redesign files, saves us time from emailing you a list of issues, and it gets your album or artwork out the door and in your hands quicker. You may be wondering what’s the best way to prepare double-sided or multi-page artwork files for print. Great question, here’s a quick summary:

1) Download the correct templates

Template downloads page

This will always be the first step for any artwork tutorial. Download the templates off of our site, as they are sized to our printing standards and products. Make sure you download the latest template, not just the one that’s been sitting in your Documents folder for two years!

2) Add art in a separate layer

Artwork in separate layer from templates

Most templates will have two visible layers: one that’s marked for Templates, and one that’s marked for Art. Please design using the Art layer in CMYK. If you don’t see an Art layer, create a new layer.

You can begin designing your artwork. Some templates, like our cassette J-cards, will have a file for the front cover and another file for the back cover. The template may also include a file specifically for Adobe Illustrator users where front and back covers are spread across two pages.

3) Save files twice, with and without the template lines

You’ll have to hit Save As two times per page. Once with the template layer visible, and once with the template layer disabled.

STEPS 4 AND 5 APPLY TO ADOBE PHOTOSHOP USERS,
ADOBE ILLUSTRATOR USERS CAN SKIP TO STEP 6

4) Open PDF Presentation

Have your front cover or first page file open. Click on File -> Automate -> PDF Presentation.

5) Add files

PDF Presentation

Here you can add files that are currently open in Photoshop, or browse to search for saved files. Make sure you’ve selected Multi-Page Document under the ‘Save As’ option.

Click ‘Save’. You’ll again have to do this twice: once with all the files that have template lines enabled, and once with the files that have template lines disabled.

6) Save as a PDF/X-1a:2001

Save as a PDF/X-1a:2001

The final step! Just use the settings you see above. Most important is that the Adobe Preset is set to PDF/X-1a:2001.

That’s all you need to prepare your artwork! Leave the rest to us, and soon you’ll have high-quality artwork or packaging for your new album. We use digital press for small runs and super high-quality offset press for larger runs and by request. You can find all of our printed products in our online shop.

Get Quick Turnaround on Printed 12” Vinyl Jackets

The online shop offers everything you need for a 12” vinyl release, from innersleeves to mailers to even vinyl pressing itself. One of our biggest sellers are digitally printed 12” vinyl jackets, done in stunning full-color CMYK with spine. As tour season approaches, we understand you may be pressed for time, so we’re now offering 3-week and 4-week rush orders!

Our vinyl jackets were previously only available with economy turntime. This would allow us to gang-up orders as to keep costs low, with a turntime of 6 to 8 weeks before shipping. While the price was right, this isn’t always an ideal scenario for musicians, thus we’ve included easy-to-add rush options for either 3-week or 4-week turnaround before shipping. No need to contact a sales rep, just select your turnaround time and you’re good to go.

Turntime only begins once print-ready files are received. A print-ready file needs to be submitted using our template, with artwork layers merged and proper bleed. For even more stunning print jobs you can upgrade to our offset press.

Order digitally printed vinyl jackets and have them ready in as soon as 3 weeks!

Need more than just the vinyl jacket? Need the whole vinyl pressing package? Get everything in one swoop with our vinyl pressing combo deals! These include the vinyl color of your choice, printed jacket, innersleeve, insert, and shrinkwrapped assembly. We have two different pressing methods: the standard packages used with a 2-step stamper and lacquer, and our Quick 1-Step packages which are done with MVM pressing and a 1-step stamper. The latter gives you lightning quick turnaround— an estimated 6 to 8 weeks before shipping— with a minimum order of just 50 copies!

Order 7” or 12” vinyl pressing from Duplication.com

Tips and Tricks for Home Printing

If you release your cassettes DIY style, then you’re surely no stranger to our blank printed material. From sticker labels to blank J-cards, Duplication.ca provides you with the sheets and templates needed to turn your home setup into a printing press.

Every now and then we receive a question on our live chat service asking for help with printing at home. We thought it would be a good idea to run through a short list of helpful tips to make your DIY experience a smoother process!

J-card templates from Duplication.ca

Use Our Templates

First and foremost, we design our blank printing products using our template sizing, so that means you should be using our templates as well. If you purchase sheets of cassette sticker labels but use a random template you found on Google you may find that the sizing will be completely off! Templates for audio cassettes can be found here, and all other template types can be found on this page. The product page for your item, for example this sheet of J-cards, also includes a link to the template.

It’s best to open the templates with Photoshop, Illustrator, or GiMP, as they often contain layers.

How to print cassette labels and J-Cards

Do Not Resize

When designing or readying for print, do not crop or resize the template, or stretch the template to fit your artwork. It’s important that the template is printed as is, so that includes the settings in your printing options.

You will want to make sure that the scale is set to 100% under ‘Scaled Print Size’, and ‘Scale to Fit Media’ is unchecked.

Add bleed to your cassette labels and J-Cards

Add Bleed and Title Safety to Your Image

Consumer printers are prone to misalignment and movement. The cheaper the price and build of a printer the more it will shake when printing, meaning precise down-to-the-millimeter print alignment may not always be possible. This is why you add bleed to your image, so if there is slight movement you won’t be treated to an ugly white line of empty space. A hairline of empty space may go unnoticed by a good number of your fans but it will absolutely drive you crazy knowing it’s there! The standard bleed amount is an extra .125” of image from the template line.

Same goes with a title safety area. You shouldn’t be placing text right at the edge of the template lines, because if there’s any movement you’re risking the text being partially cut off. Suddenly your solo noise project RAT LOTION reads as AT LOTION, and your labels are ruined!

My Printer is a Hunk of Junk and it’s Not Working!

If you still find that there’s significant misalignment, one trick is to move the artwork in your photo editing software to make up for the shifting. That may be tricky and take a few tries, which is why we recommend ordering extra sheets for tests and contingency.

Your local print shop is surrounded by printer issues day and night, so they will likely understand what you’re trying to accomplish. Drop off your sheets and your files on USB and they can give it a shot.

Duplication.ca’s pressing plant is working around the clock to get your print orders looking bright and gorgeous. If you want to keep it DIY, hit us up on our live chat (the green bubble on the bottom right corner of the Duplication.ca website) and let us know your issues, we’ll do our best to help. If you want high quality printed products without the pain and anguish of your 12 year old Canon printer spouting errors, we can print your J-cards, stickers, and all other material using our high quality digital press (or ultra high-quality offset press) with thick and durable cardstock.

Cheaper J-Cards With Faster Turnaround Using Automated Print

Do you want even more affordable printed J-cards, faster to your door, without having to skimp on quality? Unbelievably, Duplication.ca can provide that for you! Introducing our Automated Print products:

Rancid's "Tomorrow Never Comes" cassette J-card

The Automated Print items work similarly to the standard online shop system, but instead the artwork is uploaded through our Online Designer. This allows you to design your artwork in-browser without the use for an expensive graphic design suite, or simply drag ‘n drop your pre-existing artwork into the Online Designer. After checkout your artwork is automatically sent to the printer queue, with zero hassle in between! Not only does this mean your J-cards will be printed, scored, and shipped quicker, but it also saves pre-press time on our end. We pass those savings on to you, making the J-cards even cheaper than our regular print pricing.

J-card creasing machine

Using the online designer is remarkably simple, you can review the guide we wrote up a couple of weeks ago. Just remember to extended the artwork past the template lines, and to double-check your work as to ensure your artwork appears as intended! You will need to approve your artwork once more after checkout, which serves as a final opportunity for a quick inspection.

All these benefits without having to compromise on quality! The J-cards are professionally printed using Cougar™ Super Smooth stock— 80lb smooth cover at 216 GSM. Double-sided printing is included in the price, with bright and vibrant colours on durable paper.

UV Print On Cassette

Full body print

UV print has totally revolutionized how you can design your cassette releases. You no longer need to limit yourself to one or two colours, you have the entire CMYK spectrum to choose from when designing your masterpiece. Even better, with Full Body UV print you can design artwork on the raised edges and bottom hub area of the cassette shell, doing away with the constraints found in sticker labels and pad print! Our template includes knockout layers for the hubs and window, that way ink will not seep inside of the shell.

Ordering Full Body Print is easy! Just select it from the ‘Label type’ dropdown menu. You have a choice between single sided or double sided artwork, just like with pad print. We’ve also added UV print as an item in our online shop to add to your blank tapes!

Stained glass and reverse UV print

What makes UV print pop on cassette is the white base coating applied before your artwork, which stops the ink from being absorbed by the plastic shell, especially with darker shell colours. However, when you don’t apply the white base, you instead get a semi-transparent effect, wherein you can see the artwork but light can still shine through with transparent shells – very similar to stained glass!

With transparent shells you can sidestep the white base coating to also achieve a visible reverse print. Here’s an example by Monster Piece, released by Sly Vinyl Records, where you can see the reverse image of the Side B artwork by looking through Side A. This gives a sense of perspective and distance, as if the moon is in the background and the howling werewolf in the foreground. The B-side will show the artwork in its correct orientation as provided by the artist.

Omitting the white base coating for a stained glass effect or reverse print is available by request! Just add UV Full Body print to your cassette order and let us know your desired effect in the ‘notes’ section of your order.

📸 courtesy of Sly Vinyl Records

Order cassette duplication with UV print

The Duplication.ca Guide to Pad Print Design

When you put in a cassette order you want the finished product to look its absolute best. Following these steps not only makes our job easier, but it will ensure that your pad print will look just as gorgeous as intended. First you’ll need to place your order on our cassette duplication calculator, then we can get started!

TV Blonde - Talmbour cassette tape from Duplication.ca

DESIGNING YOUR ARTWORK

1) Download our latest template

There are a few things to consider when designing pad print artwork for your order. First, what kind of shell have you chosen? Our templates have layers for opaque tapes, clear/windowless, and shells with square hub windows.

https://www.duplication.ca/printspecs/cassette-cover-templates.htm#padprint

Each template has useful information about designing artwork that is unique to each type of cassette shell chosen, so be sure to check if we have updated templates available with every order and follow the directions contained in the file!

2) Applications

First and foremost, we highly recommend you send us vector artwork, so you should be using applications such as Adobe Illustrator or CorelDraw to design vector logos and line text. Graphic design applications such as Adobe Photoshop or GiMP can be used, but bitmapped images will be subject to additional fees. 

MEET THE MINIMUM REQUIREMENTS

1) Vector Artwork

We now require vector artwork for pad print. It helps us achieve finer lines with a fraction of the platemaking time. It’s best to create artwork as a vector image, but we recognize that sometimes images are sourced from bitmap files or hand drawings. Outside of CorelDraw and Illustrator, there are freeware websites that allow you to upload your image and they will trace the outlines to convert to a vector file. The results will vary and often depend on the complexity and quality of your source material. Some websites have more options than others, so be prepared for trial and error tweaking until you’re satisfied. Further tweaking can be done in programs like Illustrator, PhotoPea, or even Photoshop.

Here are a few websites worth checking out:

Rapid Resizer
Vectorization.org
Autotrace (Online Converting)
PhotoPea (click on Image -> Vectorize Bitmap)

Difference in quality between bitmap (left) and vector (right)

If you cannot retrace your images or convert to vector, we will be able to do it for a small fee. Bitmap images are also subject to a fee as they can take up to 20x as long to print the plate.

2) Grayscale

Regardless of your chosen ink colour, make sure your artwork is done in black. If you requested 2-colour pad print you’ll need to have each colour artwork in its own layer. The layers should be properly titled with their colour name (ex. one layer would be titled ‘Red’ and the other ‘Blue’). Again, regardless of the desired ink colour, each layer artwork must appear black.

3) Resolution

A low resolution can cause the finished product to look pixelated and of poor quality. If you are using Photoshop or your own template, ensure the dimensions and resolution are 4331 x 4331 pixels wide at 1000 ppi. Please note that resolution isn’t applicable when working with vector art.

4) Creating Outlines for Text

Often times we will receive a file with missing fonts, which means your meticulously curated typeface design will revert to a basic font style when we open the artwork file. But there’s an easy solution to this– simply Create Outlines for your text!

All you need to do is select your text, then navigate to the Type menu and select Create Outlines. The same can be done in Photoshop by selecting your text with the Direct Selection Tool and clicking on Convert to Shape in the Type menu. Avoid using faux font styling as it may not convert properly.

Another method is to ‘Expand’ your text. This video gives a quick explanation on how to do so:

5) Line Thickness

When you’re designing your artwork, you’ll want to keep an eye on line thickness. In order to ensure that your art will be visible when printed you’ll want your artwork lines to be at least 0.15 points thick. This is about the equivalent thickness of very fine hair. Anything less than 0.15 points risks not being visible on the final printed cassette. This applies to text as well.

Moreover, the knockout, gaps, or empty space between artwork also has to be a minimum of 0.5 points thick to properly print, otherwise there is the risk of ink running and filling up the empty space. Please make sure all empty space is at least 0.5 points thick to avoid spreading ink.

Zooming in shows that the select horizontal area is 0.1 points thick.
An illustrated breakdown of line thickness.

6) Mind the Gap

Depending on the type of shell you have chosen, there are areas you cannot print on. For example, there are two holes in every cassette shell which obviously cannot be printed on! Solid coloured shells, certain select clear shells, and square window shells have a recessed window in the center which can distort artwork, especially text. If you are uncertain about the type of shell you have chosen for your artwork, contact your sales representative!

Pad print artwork over hub area
An example of areas where the artwork will not print.

7) Tell Your Sales Representative

Make sure that your sales representative knows exactly what your order needs, as there may be a price difference. If you want the A and B sides printed, it is “pad print two sides” on the cassette duplication calculator. If you just want the A side printed, it is “pad print one side.” If you’d like the exact same art on both sides, it is “pad print same art both sides.

Once your artwork is complete and uploaded, let your sales representative know! They will double check your artwork to make sure it is compatible before sending it through to our pad print department. If you have any questions, be sure to reach out to them! They are happy to help!

Thank you for reading, and happy designing!

VHS is Back and Better Than Ever!

VHS is Back and Better Than Ever!

Who can forget the feeling of walking through the video store, strolling from aisle to aisle, trying to find the perfect VHS tape to watch that night? Sure, streaming services offer us thousands of options, but gone is the ritual of popping in a physically tactile VHS, an object which gives a film respect and purpose not unlike what an audio cassette or vinyl does for music. At Duplication.ca you can get your film or video project duplicated on VHS with full packaging, thus giving your work the attention it deserves!

Modern VHS releases are a wonderful medium because they aren’t just limited to feature-length releases, but a whole gamut of audio/visual projects. Music video compilations, short films, vaporwave visuals, live gigs, just to name a few. As a filmmaker or a musician you can sell your work online or at the merch table at a screening or performance, rather than navigate the film festival or streaming distribution circuit.

Not only do our dubbed VHS tapes look excellent, our print and packaging are of superb quality. Printed cardboard sleeves are in full colour CMYK with your choice of digital or offset press. The sleeves snuggly fit the video cassette without being too tight or loose. You can even add glossy AQ coating for an additional fee if you want it to feel silky smooth and shine against the light.

Order VHS duplication with printed cardboard sleeves


Another packaging option are our clear plastic library cases, which contain an overlay film so you can add a printed wraparound sheet for artwork. Since the cases are clear, you can even request double-sided printing for extra artwork or notes! Sticker face labels and spine labels can be added to both the library cases and printed cardboard sleeves.

Order VHS duplication in clear library cases

Printed VHS sticker labels

Do you have the equipment to duplicate your own VHS tapes? Then we have everything you need to DIY analog style! We received a restock of blank VHS tapes, with a wide variety of lengths and brands to fit your needs, including some superb quality S-VHS tapes and economy one-pass tapes. You can also find blank labelslibrary cases, and custom-printed products in the online store.

View all our VHS products and services in the online store

The Guide to Pad Print Colours

Vampire Step-Dad pad print

We’ve been pad printing cassette shells since the 1990s, so we know the ins and outs of providing a quality print job just like you intended in your design. We use opaque ink for pad print, unlike offset pad printers which use a type of paste that is thinner and appears more transparent. Our pad print jobs are done individually by hand, allowing us to see the result of every print. This gives us a huge advantage in maintaining great quality assurance. Check out our pad print machine in action on YouTube.

Pad print colors

Our selection of pad print colours

That said, certain ink colours look better on certain shells. Black or dark ink will appear striking and vibrant on white or lighter colour shells, while the inverse not so much. The ink is opaque, but the plastic shell will still absorb some of the colouring. Take a look at this colour mixing diagram:

Pad print ink color mixing

Notice the color changes on the overlapped sections. Blue ink on a red shell may appear more purple, and will thus be a bit more difficult to read. Similarly, yellow is a lighter colour than red, so it may be absorbed by the red shell and appear more orange. It’ll look cool, but not exactly what you had in mind when designing.

If you insist on continuing with unconventional colour schemes like blue on red, there are a few solutions—

  1. Request double-hit with your pad print. This will give your colour a little extra oomph and emphasis against a darker shell colour. It may not solve the problem of a particularly light ink colour against a dark shell, but it will certainly look better than single-hit pad print.
  2. Upgrade to 2-colour pad print and use the bottom layer as a white base. Locking the shell into place for two separate ink stamps is extremely difficult and won’t always work, so you will want to make the white base larger than your design (like a stroke or outline filter), or slightly smaller than your design, that way it’s not off-register.
  3. Request a custom colour ink. We can add white ink to an ink colour for an extra fee to make it a bit more vibrant when placed against a darker colour shell.

If you’re not sure if a colour combination will be as vibrant as your design, ask your sales rep for their thoughts, we’ve seen it all over the years! You can add pad print to your cassette package through our cassette duplication calculator and receive free shipping to the United States and Canada.